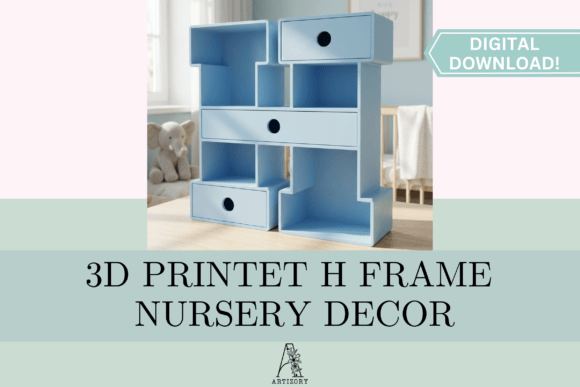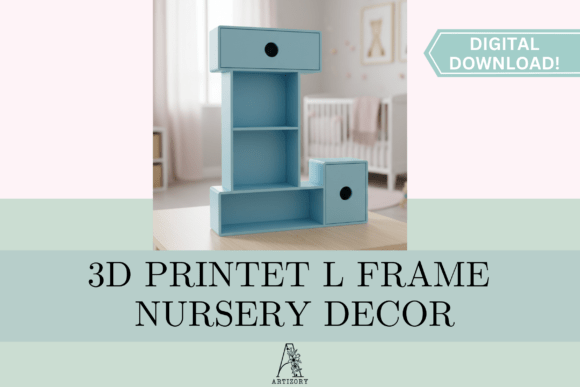
Mastering the Letter L Organizer Shelf STL 3D Print for Professional Results
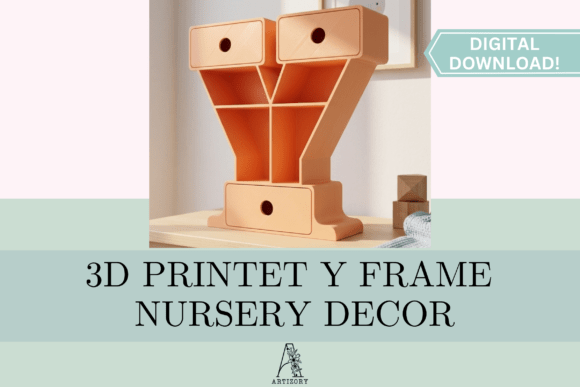
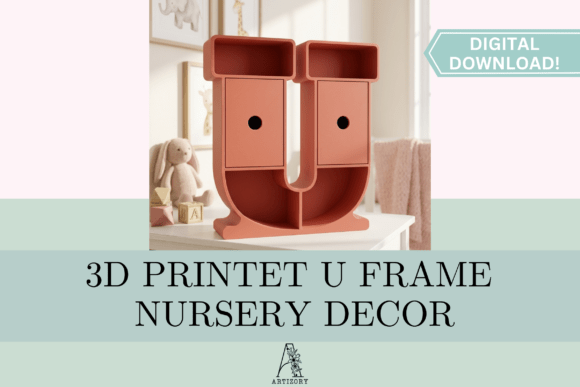
The Letter L Organizer Shelf STL 3D Print represents more than just a trendy addition to a nursery or office; it is a functional piece of engineering designed for real-world utility. For small business owners, hobbyists, and creators, this monogram cubby offers a unique opportunity to blend personalized decor with practical storage. Featuring a clean, modern aesthetic and a fully functional drawer, this design stands out in the crowded market of alphabet organizers. However, achieving a professional finish requires more than simply hitting "print." Many enthusiasts and entrepreneurs overlook critical details regarding file optimization, print settings, and assembly, leading to results that fall short of the sleek, minimalist look promised by the design.
Understanding the nuances of this specific 3D print STL file for Letter L shelf organizer is essential for anyone looking to expand their catalog or create a high-quality gift. While the design is optimized for FDM printing and fits standard 25x25 cm print beds, the difference between a wobbly prototype and a sellable product often lies in the preparation and execution phases. By addressing common pitfalls early, you can ensure consistent results that satisfy customers and enhance your reputation as a creator.
Avoiding Common Pitfalls in File Selection and Preparation
One of the most frequent mistakes makers encounter involves assuming all STL files are created equal. When searching for a Letter L storage STL, beginners often prioritize low cost or free downloads without evaluating the structural integrity of the model. A poorly designed file may lack adequate wall thickness for the drawer rails or fail to account for the tolerance needed between the drawer and the main body. This oversight leads to drawers that are either too tight to slide or so loose they fall out when the shelf is mounted on a wall.
To avoid this, always inspect the model's specifications before downloading or purchasing. Look for designs that explicitly mention tolerance testing and functional optimization. The ideal file should feature reinforced corners and smooth rail surfaces to minimize friction. If you are building a full alphabet collection for a custom name project, consistency is key. Ensure the Letter L cubby matches the dimensions and style of other letters in the series to maintain a cohesive look. Ignoring these details can result in a mismatched set that looks unprofessional and reduces the perceived value of your work.
Optimizing Print Settings for Strength and Aesthetics
Even with a perfect file, incorrect slicer settings can ruin the final product. A common error is using standard infill percentages that are too low for a load-bearing shelf. While the Letter L Organizer Shelf STL 3D Print is designed to be sturdy, printing it with only 10% infill may cause the shelves to sag under the weight of books, toys, or office supplies. Conversely, using excessive infill wastes material and increases print time without adding significant strength.
Practical Advice: Aim for an infill density between 20% and 30% using a gyroid or cubic pattern. This provides excellent structural support while keeping the print lightweight. Additionally, pay close attention to wall line counts. Increasing the number of perimeters to three or four often yields a stronger part than increasing infill, especially for the vertical supports of the letter "L".
Another overlooked detail is the orientation of the print on the bed. Although the design fits a 25x25 cm bed, placing it incorrectly can lead to poor layer adhesion on stress points. For the best balance of strength and surface quality, print the main body flat on the build plate. This orientation ensures that the layers run horizontally, preventing the shelf from snapping under vertical load. Remember, the goal is a professional finish with zero hassle, so taking a few extra minutes to orient the part correctly saves hours of troubleshooting later.
Managing Supports and Post-Processing Efficiently
The design of this functional alphabet series item is clever, requiring minimal supports only for the drawer handle. Yet, many users make the mistake of enabling global support generation in their slicing software. This not only wastes filament but also leaves unsightly marks on the smooth faces of the letter, ruining the modern aesthetic. Removing excessive supports can also damage delicate features if not done carefully.
The correct approach is to use manual support blocking or tree supports specifically targeted at the overhangs of the handle. Since the rest of the geometry is self-supporting, trust the design. Once printed, post-processing should be minimal. Light sanding on the support contact points and a quick wipe-down are usually sufficient. If you plan to paint the organizer, apply a primer suitable for your filament type (PLA, PETG, etc.) to ensure even coverage. Skipping the primer can result in a patchy finish that highlights layer lines rather than hiding them.
Assembly and Functional Testing
Perhaps the most critical phase is the assembly of the drawer mechanism. A frequent misunderstanding is that the drawer should fit tightly immediately off the printer. In reality, 3D printed parts require clearance to function smoothly. If the drawer sticks, do not force it, as this can strip the rails or crack the housing. Instead, lightly sand the sliding surfaces of the drawer or adjust the horizontal expansion setting in your slicer for future prints.
For small business owners offering personalized nursery decor or office storage, functionality is your selling point. Test every unit before shipping. Slide the drawer in and out multiple times to ensure smooth operation. Check that the shelf sits flush against the wall or desk surface. If you are mounting it, verify that the screw holes align properly and that the backing is robust enough to hold the intended weight. These small checks prevent returns and negative reviews, protecting your brand's integrity.
- Check Tolerances: Ensure there is a 0.2mm to 0.4mm gap between moving parts.
- Verify Bed Adhesion: Use a brim if necessary to prevent warping on the long edges of the "L".
- Material Choice: Consider PETG for higher durability if the shelf will hold heavy items, though PLA is sufficient for standard decor.
- Color Consistency: If printing a set, ensure spool batches match to avoid slight color variations between letters.
Expanding your shop's catalog with this versatile 3D printing file for small businesses is a smart move, but success depends on attention to detail. By avoiding cheap, unoptimized files, dialing in your slicer settings, and respecting the mechanical requirements of the drawer, you transform a simple digital file into a high-value physical product. Whether you are printing a single Letter L as a thoughtful gift or manufacturing a complete name set for a client, these practices ensure your output remains sturdy, stylish, and ready for real-world use. Embrace the precision that 3D printing offers, and let the clean lines of this organizer speak to the quality of your craftsmanship.